This post describes how to create objects in Azure environment for tutorial Create Azure API App with AAD authentication and web jobs.
Create dashboard and Azure resource group
- Open Azure portal, log in with your Microsoft account.
- Click “+ New dashboard”, rename it to “Azure API APP with AAD Auth”, click “Done customization”. It allows pin tiles for new objects to this new dashboard.
") New dashboard
New dashboard") Named dashboard
Named dashboard") Empty dashboard
Empty dashboard - Click “Resource groups” in the left pane, click “+ Add” button. Blade that creates an empty resource group is shown.
- Use the following values for properties of resource group:
Property Value Resource group name Azure_API_app_with_AAD_Auth Subscription Your subscription Resource group location Use the closest data center to your customers Check “Pin to dashboard”, and click “Create”.
") Resource groups
Resource groups") New resource group
New resource group") Notification
Notification - If resource group was created successfully, portal shows our dashboard with empty tile of created resource group.
- Pull at the right bottom corner of
Resourceswidget, and increase it to 4×6 size.
") Resize tile
Resize tile") Customize dashboard
Customize dashboard") Updated dashboard
Updated dashboard
")
")
")
")
")
")
Create Azure storage
Two storage accounts should be created. One of them is used for storing images, thumbnails and keeping queue. The second is used for logging.
Let’s note, that storage name is used as part of direct url, so it should be unique among all Azure storage accounts, be lowercased and has from 3 up to 24 symbols. That is why used below names should be extended by unique prefix like your second name, project title, so on.
- Click “Storage accounts” in the left pane, click “+ Add” button. Blade that creates storage account is shown.
- Use the following values for properties of storage:
Property Value Name azureapiappdata Deployment model Resource manager Account kind General purpose Replication Geo-redundant storage (GRS) or Read-only geo-redundant storage (RA-GRS) Subscription Your subscription Resource group Use existent, and choose “Azure_API_app_with_AAD_Auth” Location Use the closest data center to your customers Click “Create” to create azure storage.
") Storage accounts
Storage accounts") New storage account
New storage account") Create storage account
Create storage account") Creating storage account
Creating storage account - Repeat previous step to create “azureapiapplog” storage account.
- Click on “Microsoft Azure” title in the left top corner and take a look at dashboard. It contains one tile with the list of created resources.
") Create storage account
Create storage account") Creating storage account
Creating storage account") Deploy storage account
Deploy storage account") Storage accounts
Storage accounts") Dashboard
Dashboard
")
")
")
")
Create App Service plan
- Click “+ New” in the left pane, and search from “App Service Plan” object. Search blade shows the list of found objects, where the first should be “App Service Plan” by Microsoft. Click on it, and click “Create” on the next blade.
") Search blade
Search blade") Description
Description") New app service plan
New app service plan - Use the following values for properties of app service plan:
Property Value App Service plan AzureApiAppPlan Subscription Your subscription Resource group Use existent, and choose “Azure_API_app_with_AAD_Auth” Operating System Windows Location Use the closest data center to your customers Pricing tier You may keep default value “S1 Standard”. Otherwise, click at pricing tier button and choose another tier. For preview and test purposes “D1 Shared” is enough. Let’s note, that app services are charged per instance, not per plan. Click “Create” to create azure storage.
") Create app service plan
Create app service plan") Change pricing tier
Change pricing tier") Creating app service plan
Creating app service plan") Deployment
Deployment") Dashboard
Dashboard
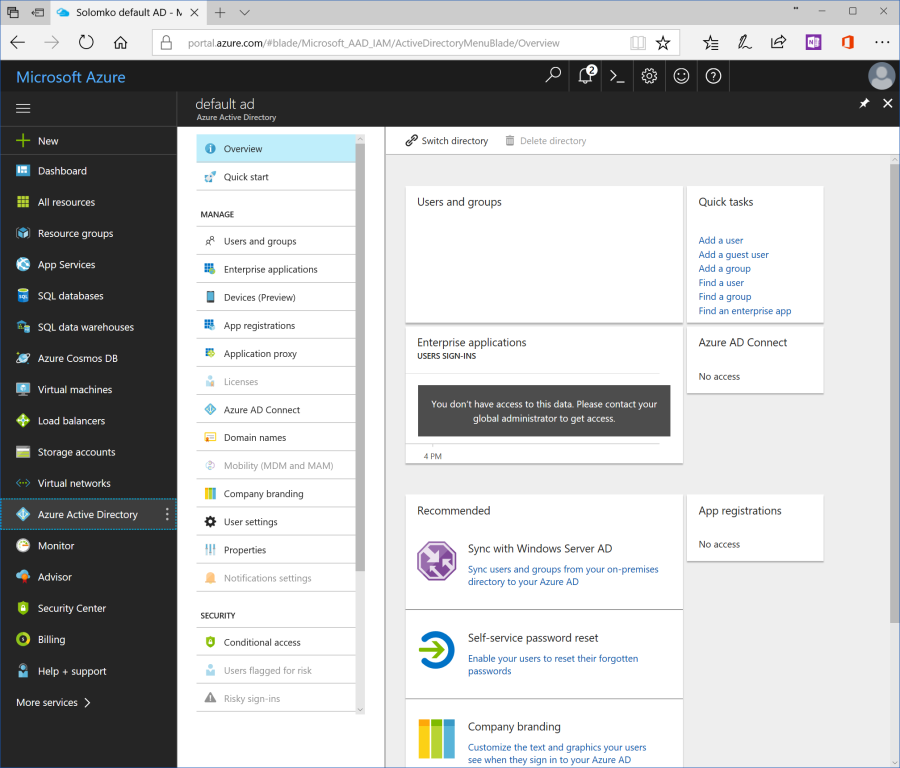
Check AAD
Click “Azure Active Directory” in the left pane. Blade that shows current active directory objects is shown.
1. All used IP-addresses, names of servers, workstations, domains, are fictional and are used exclusively as a demonstration only.
2. Information is provided «AS IS».
